Getting Norton Secure VPN to work on Linux
Norton Secure VPN is a paid VPN service that's packaged in Norton 360. Officially, only Windows, Mac, Android and iOS are supported, but the underlying protocol is OpenVPN so it can be made to work with any platform with enough effort!
Background
Last year I received a free code for Norton 360 Deluxe in an online event. I don't really use third party antivirus, especially not Norton because of their terrible reputation when it comes to slowdowns, so I quickly found out that I had little use for a VPN subscription.
That was until a few days ago. I was thinking it might be useful to have an alternative external IP ready for projects such as scrapers and scanners and was considering the various VPN options Youtube is full of, when I remembered that Norton comes with a VPN product if you get their deluxe package. If I could get the VPN to work on my system, that would save me several euros per year on VPN prices for something I'll rarely be using anyway.
I realised quickly that it wouldn't be very easy to get the system going. Dedicated VPN providers, such as PIA and Nord, list VPN config files for all kinds of platforms, usually in the form of OpenVPN configuration files. Norton, being the big, bad company that it is, only provides their custom client, stuffed full of analytics and tracking.
I did not believe Symantec would be dumb enough to invent their own private VPN protocol, so I quickly got started by downloading their VPN app and got working on finding out what happens.
What kind of VPN are we dealing with?
Android applications are packaged in so-called APK files. These files are akin to Java jar files, in that they're zip files with a different extension, a signature and a specific format to load code. Knowing this, I quickly extracted the APK file with unzip and took a look at what I could find inside the package.
It turns out that my hunch was right; Symantec did repackage OpenVPN like most VPN providers, because I quickly found a conveniently-named client.ovpn, right next to root.key and ca.crt right in the assets directory!
$ unzip -q com.symantec.securewifi.apk
$ ls
AndroidManifest.xml
androidsupportmultidexversion.txt
assets
billing-ktx.properties
billing.properties
classes2.dex
classes3.dex
classes.dex
com
DebugProbesKt.bin
firebase-analytics.properties
firebase-common.properties
firebase-components.properties
firebase-crashlytics.properties
firebase-datatransport.properties
firebase-encoders-json.properties
firebase-encoders.properties
firebase-iid-interop.properties
firebase-iid.properties
firebase-installations-interop.properties
firebase-installations.properties
firebase-measurement-connector.properties
firebase-messaging.properties
kotlin
lib
META-INF
okhttp3
play-services-ads-identifier.properties
play-services-analytics-impl.properties
play-services-analytics.properties
play-services-basement.properties
play-services-base.properties
play-services-cloud-messaging.properties
play-services-location.properties
play-services-measurement-api.properties
play-services-measurement-base.properties
play-services-measurement-impl.properties
play-services-measurement.properties
play-services-measurement-sdk-api.properties
play-services-measurement-sdk.properties
play-services-places-placereport.properties
play-services-safetynet.properties
play-services-stats.properties
play-services-tagmanager-v4-impl.properties
play-services-tasks.properties
res
resources.arsc
transport-api.properties
transport-backend-cct.properties
transport-runtime.properties
$ find assets/
assets
assets/ping.properties
assets/pie_openvpn.x86
assets/text
assets/text/en
assets/text/en/open_source.txt
assets/client.ovpn
assets/map.sem
assets/root.key
assets/pie_openvpn.arm64-v8a
assets/nsv.properties
assets/pie_openvpn.armeabi-v7a
assets/mynorton.properties
assets/malt.properties
assets/ca.crt
assets/ta.key
assets/spoc.properties
assets/pie_openvpn.x86_64
assets/appstoreanalyzer.properties
The APK also comes packaged with an OpenVPN client for several architectures (arm64-v8a, armeabi-v7a, x86_64).
To be honest, I probably could've seen this by finding out where Symantec had hidden their open source licenses, but because I intended to go reverse engineering anyway, I didn't even bother.
When we open the client.ovpn file, we're greeted with the following contents:
client
dev tun
ping 10
ping-restart 15
connect-retry-max 1
nobind
persist-key
;persist-tun
auth-user-pass
remote-cert-tls server
verb 3
cipher AES-256-GCM
fast-io
It's not a lot, but it does provide some insight into the workings of the VPN. First of all, there's no need to guess out of the many ciphers OpenVPN supports, because the app seems to be hardcoded to use AES-256-GCM. We can also see that an additional username and password (auth-user-pass) need to be provided for the connection to work.
Disappointingly, the config file did not contain an IP or port to connect to; this meant that the file was probably just a template, with more to be added later by the application itself. This makes sense, because Symantec has servers all around the world.
Completing the ovpn file
Because the ovpn file is not complete, some code in the application must be modifying the file before passing it to the OpenVPN client. Luckily, Android native applications are written in Java and the compiler's output can be very easy to decompile, assuming that no special care was taken to mess with decompilers.
Rather than Java's JAR files, Android relies on DEX files. The point of them is the same, and there's even tools to convert between the two, but most tools only work on JAR files. I grabbed the latest release of dex2jar and got to work. There were some errors in decompilation, but with an application of this size, the decompilation process went surprisingly smooth!
$ d2j-dex2jar.sh com.symantec.securewifi.apk
dex2jar ../com.symantec.securewifi.apk -> ./com.symantec.securewifi-dex2jar.jar
Detail Error Information in File ./com.symantec.securewifi-error.zip
Please report this file to one of following link if possible (any one).
    https://sourceforge.net/p/dex2jar/tickets/
    https://bitbucket.org/pxb1988/dex2jar/issues
    https://github.com/pxb1988/dex2jar/issues
    dex2jar@googlegroups.com
I threw the resulting JAR file into JD-GUI and was greeted with a nice tree view of the package's contents:
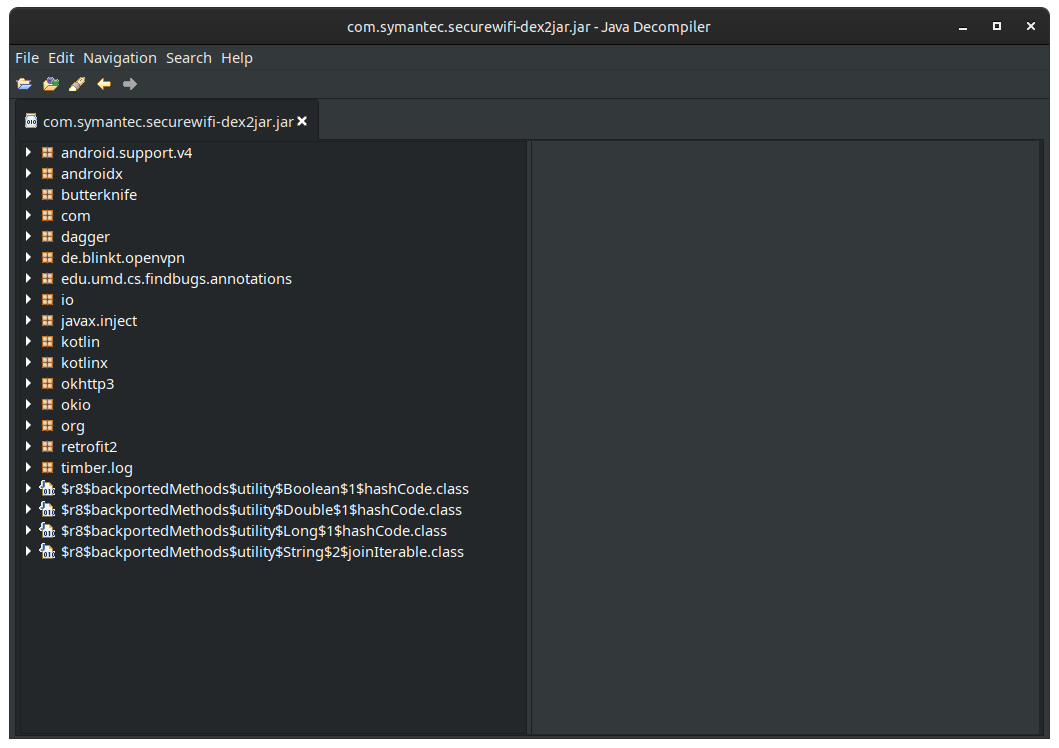
There's obviously a lot of packages in the file and I don't have the time or interest to dive into them all. Luckily, I already found the file I was looking for, so all I needed to do was search for the right string:
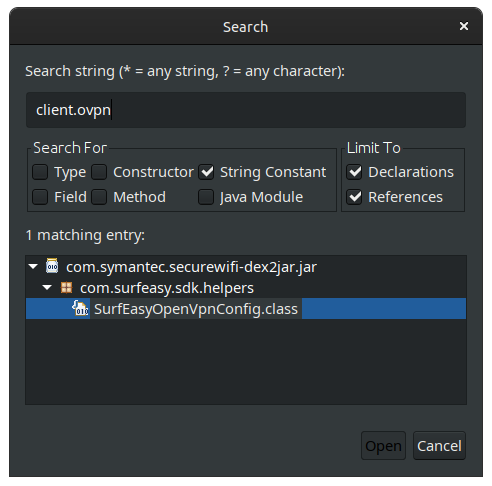
Based on the file name and the surrounding structure, looks like Symantec is using SurfEasy, another VPN provider, for the actual hard VPN work of their application. In the file, SurfEasyOpenVpnConfig.class, we find the Java methods that generate the right code. Two functions and one class are of interest:
  private void addCa(StringBuilder paramStringBuilder) {
    paramStringBuilder.append("<ca>\n");
    paramStringBuilder.append(this.caCert);
    paramStringBuilder.append("</ca>\n");
  }


  public String genConfig(Resources paramResources) throws IOException {
    StringBuilder stringBuilder = new StringBuilder(generateBaseConfig());
    DisplayMetrics displayMetrics = paramResources.getDisplayMetrics();
    Configuration configuration = paramResources.getConfiguration();
    Locale locale1 = configuration.locale;
    Locale locale2 = new Locale("en");
    configuration.locale = locale2;
    Locale.setDefault(locale2);
    paramResources.updateConfiguration(configuration, displayMetrics);
    for (Discover.Ip ip : this.ips) {
      if (ip.udpPorts() != null)
        for (int i : ip.udpPorts()) {
          stringBuilder.append(String.format("remote %s %d udp\n", new Object[] { ip.ip(), Integer.valueOf(i) }));
        }
      if (ip.ports() != null)
        for (int i : ip.ports()) {
          stringBuilder.append(String.format("remote %s %d tcp\n", new Object[] { ip.ip(), Integer.valueOf(i) }));
        }
    }
    stringBuilder.append("nobind\n");
    stringBuilder.append(String.format("<auth-user-pass>\n%s\n%s\n</auth-user-pass>", new Object[] { this.username, this.password }));
    configuration.locale = locale1;
    Locale.setDefault(locale1);
    paramResources.updateConfiguration(configuration, displayMetrics);
    return stringBuilder.toString();
  }


  public static class Settings {
    private String caFile;

    private String templateFile;

    private String tlsKeyFile;

    public static Settings create(String param1String1, String param1String2, String param1String3) {
      Settings settings = new Settings();
      settings.templateFile = param1String1;
      settings.caFile = param1String2;
      settings.tlsKeyFile = param1String3;
      return settings;
    }

    public static Settings getDefault() { return create("client.ovpn", "ca.crt", "ta.key"); }
  }
As we can see, the file client.ovpn is read into memory and appended with some other options, such as the contents of ca.crt. The library also supports loading a TLS key and a TLS key is present in the application assets, but the code does not seem to make use of it.
addCa does little more than wrap the contents of ca.crt into some <ca></ca> tags to embed the certificate authority for the VPN into the config file. The function genConfig does the actual heavy lifting. We see that the nobind option is appended to the configuration file, as well as the username and password required for the connection. Perhaps more importantly, the remote IP addresses are appended to the configuration file. These IP addresses are not hard coded into the application itself, so that means they must come from the internet.
It was time to actually run the APK.
Snooping on a VPN app
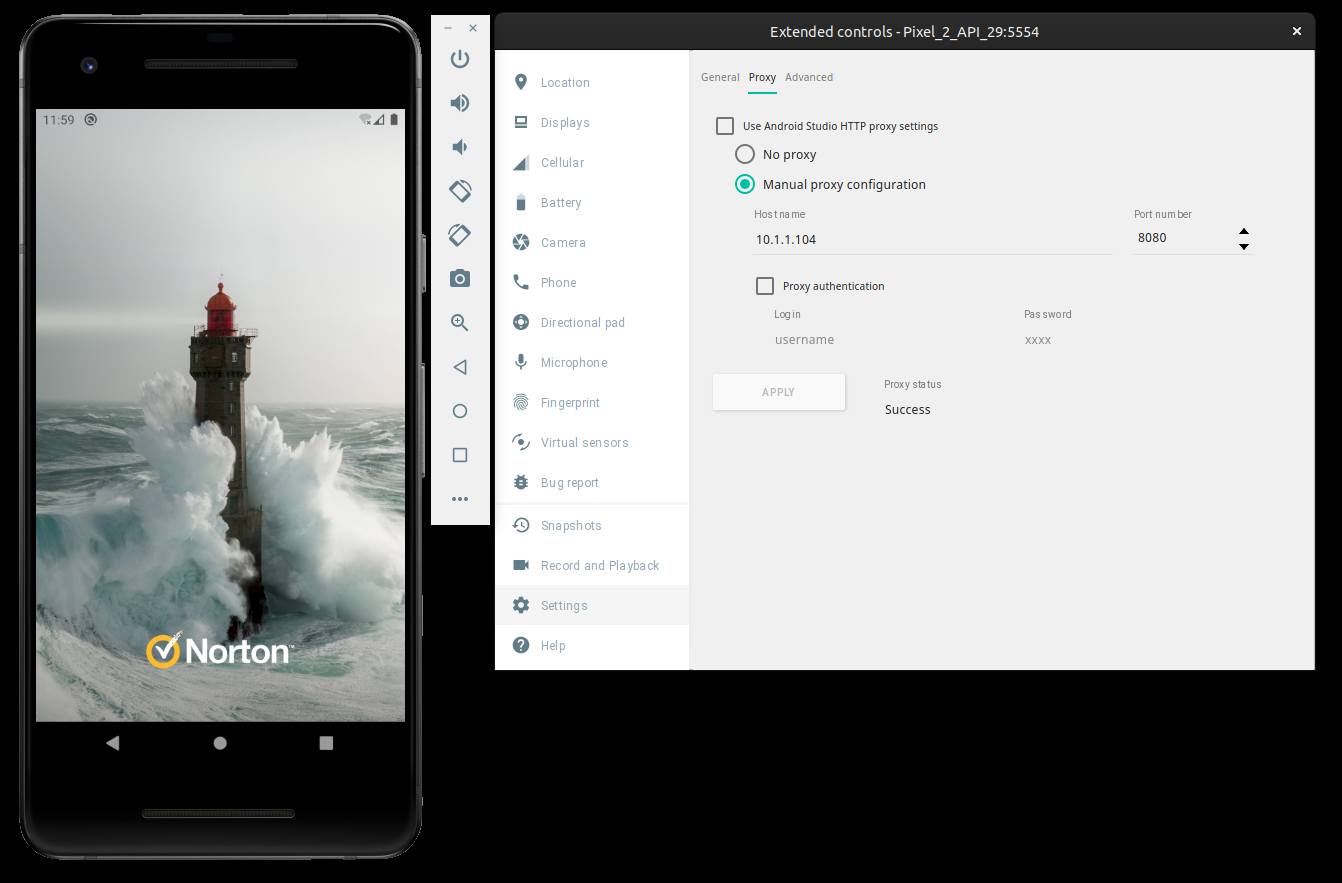
Because I don't want my personal phone's ID mixed up into the reverse engineering business, I quickly grabbed the Android emulator that comes with Android Studio and got to work.
I assumed that the applications either uses REST APIs or some other form of HTTP requests to do its actual data exchange with Symantec's servers. Mitmproxy is my favourite tool to capture network traffic for debugging purposes. On modern browsers, getting it to run is as simple as setting up a proxy in the settings and loading up the man-in-the-middle certificate authority.
I quickly set up a new Python environment and ran mitmproxy:
$ mkdir mitm
$ cd mitm
$ python3 -m venv .
$ . bin/activate
(mitm) $ python3 -m pip3 install mitmproxy > /dev/null 2>&1
(mitm) $ python3 -m mitmweb
Mitmweb started, so it was time to configure the emulator.
So, I grabbed the certificate, put it onto the emulator and added it the the user certificate store.
adb root, Google has made it difficult to edit the system image directly from inside the emulator. Stackoverflow and other help websites aren't providing much useful advice, sadly, so I needed another way in. I needed to get the security software to be insecure.Frida to the rescue
Luckily, I knew a tool for that: Frida. Frida is an open source tool for instrumenting and hijacking applications. On an Android device with root or a jailbroken iDevice, Frida makes it possible to hook into applications, intercept API calls and do all kinds of fun stuff. There's various languages you can use to instrument Frida, the most useful, in my opinion, being Javascript; with the right command line, you can use the Chrome dev tools to instrument Java code running on a device, and even inject your own Java!
I considered doing a deep dive into HTTPS pinning bypasses, but after a quick Google I found an excellent Frida script to disable all TLS verification with which I was satisfied.
To get Frida running, I downloaded the latest release of frida-server, put it and the MitM certificate in the right place with adb push and then ran it with adb shell:
$ aria2c 'https://github.com/frida/frida/releases/download/14.2.3/frida-server-14.2.3-android-x86_64.xz'
01/07 21:23:57 [NOTICE] Downloading 1 item(s)

01/07 21:23:57 [NOTICE] CUID#7 - Redirecting to https://github-production-release-asset-2e65be.s3.amazonaws.com/9405122/5fa61080-5095-11eb-86e4-41dba283ab89?X-Amz-Algorithm=AWS4-HMAC-SHA256&X-Amz-Credential=AKIAIWNJYAX4CSVEH53A%2F20210107%2Fus-east-1%2Fs3%2Faws4_request&X-Amz-Date=20210107T202357Z&X-Amz-Expires=300&X-Amz-Signature=0341c7e24a06e4729802652aa2f5a75e9b5d5a9fad8d3fa65f74a75c3edb5aad&X-Amz-SignedHeaders=host&actor_id=0&key_id=0&repo_id=9405122&response-content-disposition=attachment%3B%20filename%3Dfrida-server-14.2.3-android-x86_64.xz&response-content-type=application%2Foctet-stream

01/07 21:23:57 [NOTICE] Allocating disk space. Use --file-allocation=none to disable it. See --file-allocation option in man page for more details.
[#e99742 12MiB/25MiB(46%) CN:1 DL:9.0MiB ETA:1s]
01/07 21:24:00 [NOTICE] Download complete: /[...]/mitmproxy/frida-server-14.2.3-android-x86_64.xz

Download Results:
gid   |stat|avg speed  |path/URI
======+====+===========+=======================================================
e99742|OK  |    11MiB/s|/[...]/mitmproxy/frida-server-14.2.3-android-x86_64.xz

Status Legend:
(OK):download completed.
$ xz -d frida-server-14.2.3-android-x86_64.xz
$ adb root
restarting adbd as root

$ adb push frida-server-14.2.3-android-x86_64 /data/local/tmp/
$ adb shell 'chmod 755 /data/local/tmp/*'
$ adb push /tmp/ca.pem /data/local/tmp/ca.crt
$ adb shell /data/local/tmp/frida-server-14.2.3-android-x86_64 &
With that, Frida was now running with root permissions, ready to receive connections. I saved the Frida script as disable-pinning.js with a slight modification to load the correct certificate authority file and ran the following command after opening the Norton VPN app:
frida -U -f com.symantec.securewifi -l ./webhook-bypass.js --runtime=v8 --debug
     ____
    / _  |   Frida 14.2.3 - A world-class dynamic instrumentation toolkit
   | (_| |
    > _  |   Commands:
   /_/ |_|       help      -> Displays the help system
   . . . .       object?   -> Display information about 'object'
   . . . .       exit/quit -> Exit
   . . . .
   . . . .   More info at https://www.frida.re/docs/home/
Spawning `com.symantec.securewifi`...
Chrome Inspector server listening on port 9229

Spawned `com.symantec.securewifi`. Use %resume to let the main thread start executing!
[Android Emulator 5554::com.symantec.securewifi]->
By default, Frida freezes the process it attaches to after starting. You have to either provide a command line argument or type %resume before it continues execution. After typing the resume command, the application started.
[Android Emulator 5554::com.symantec.securewifi]-> %resume
[Android Emulator 5554::com.symantec.securewifi]->
===
* Injecting hooks into common certificate pinning methods *
===
* Setup custom trust manager
* Setup okhttp3 pinning
* Unable to hook into trustkit pinner
* Setup TrustManagerImpl pinning
* Unable to hook into Appcelerator pinning
! Intercepted trustmanager request
! Intercepted trustmanager request
Bypassing SSL Pinning
Bypassing SSL Pinning
Bypassing SSL Pinning
Bypassing SSL Pinning
Bypassing SSL Pinning
Bypassing SSL Pinning
Bypassing SSL Pinning
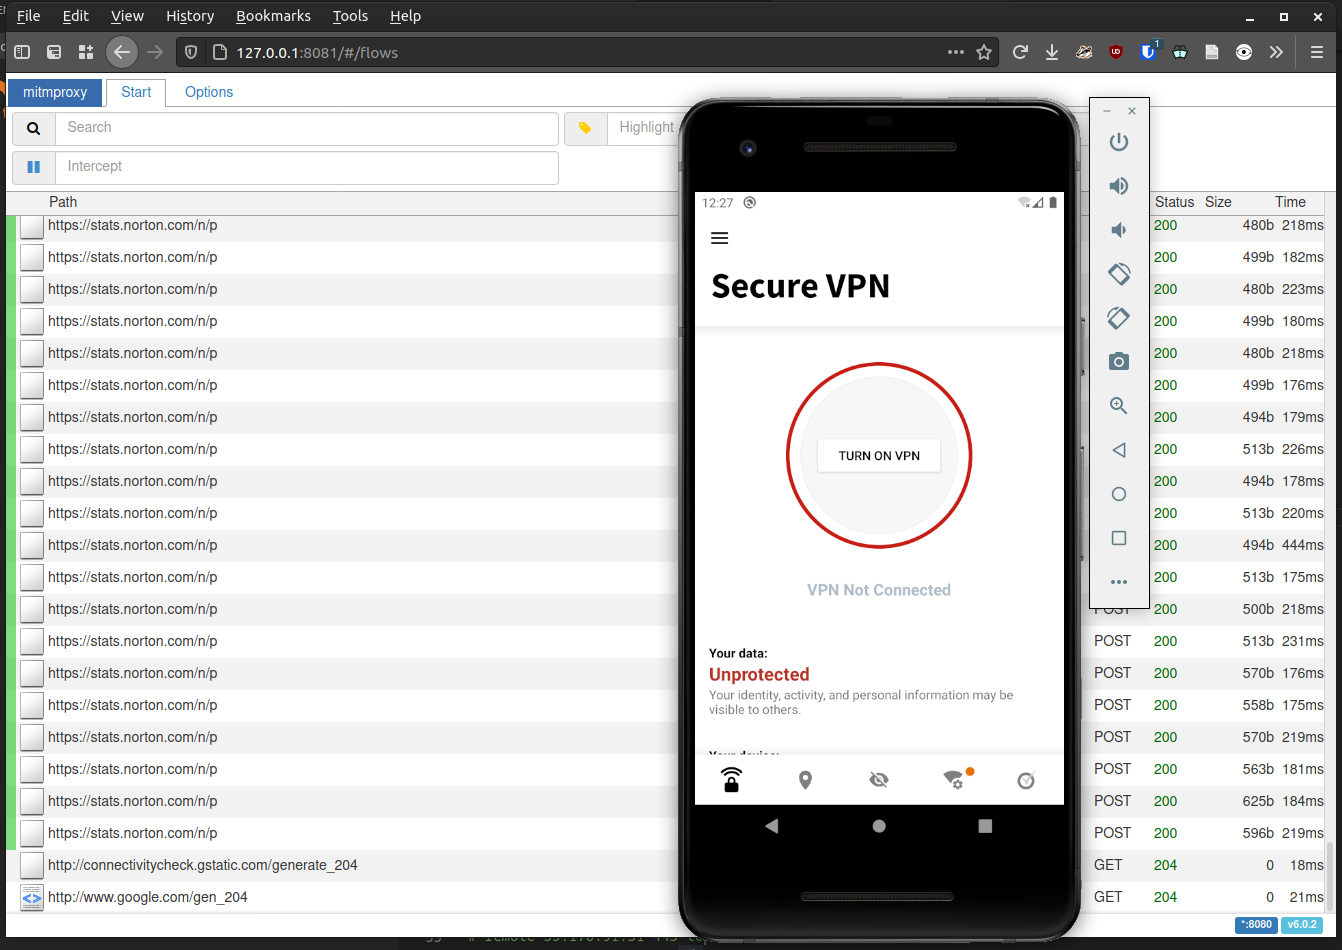
Mitmweb was now receiving requests! I logged into my account on the emulator and watched the requests fly by.
Notice the many log entries for Norton telemetry! This VPN certainly does not protect your privacy.
I had managed to get access to the secret traffic between my emulator and the Symantec servers. My next goal was to find the usernamd and password for the VPN. I also needed an IP address for the servers and their ports, but if necessary I could just extract those from Wireshark if I really needed to.
Hoping that the application used JSON like most application do these days, I entered the filter ~t application/json to list out all probably API endpoints. After some scrolling, I found an interesting HTTP request that contained everything I was looking for:
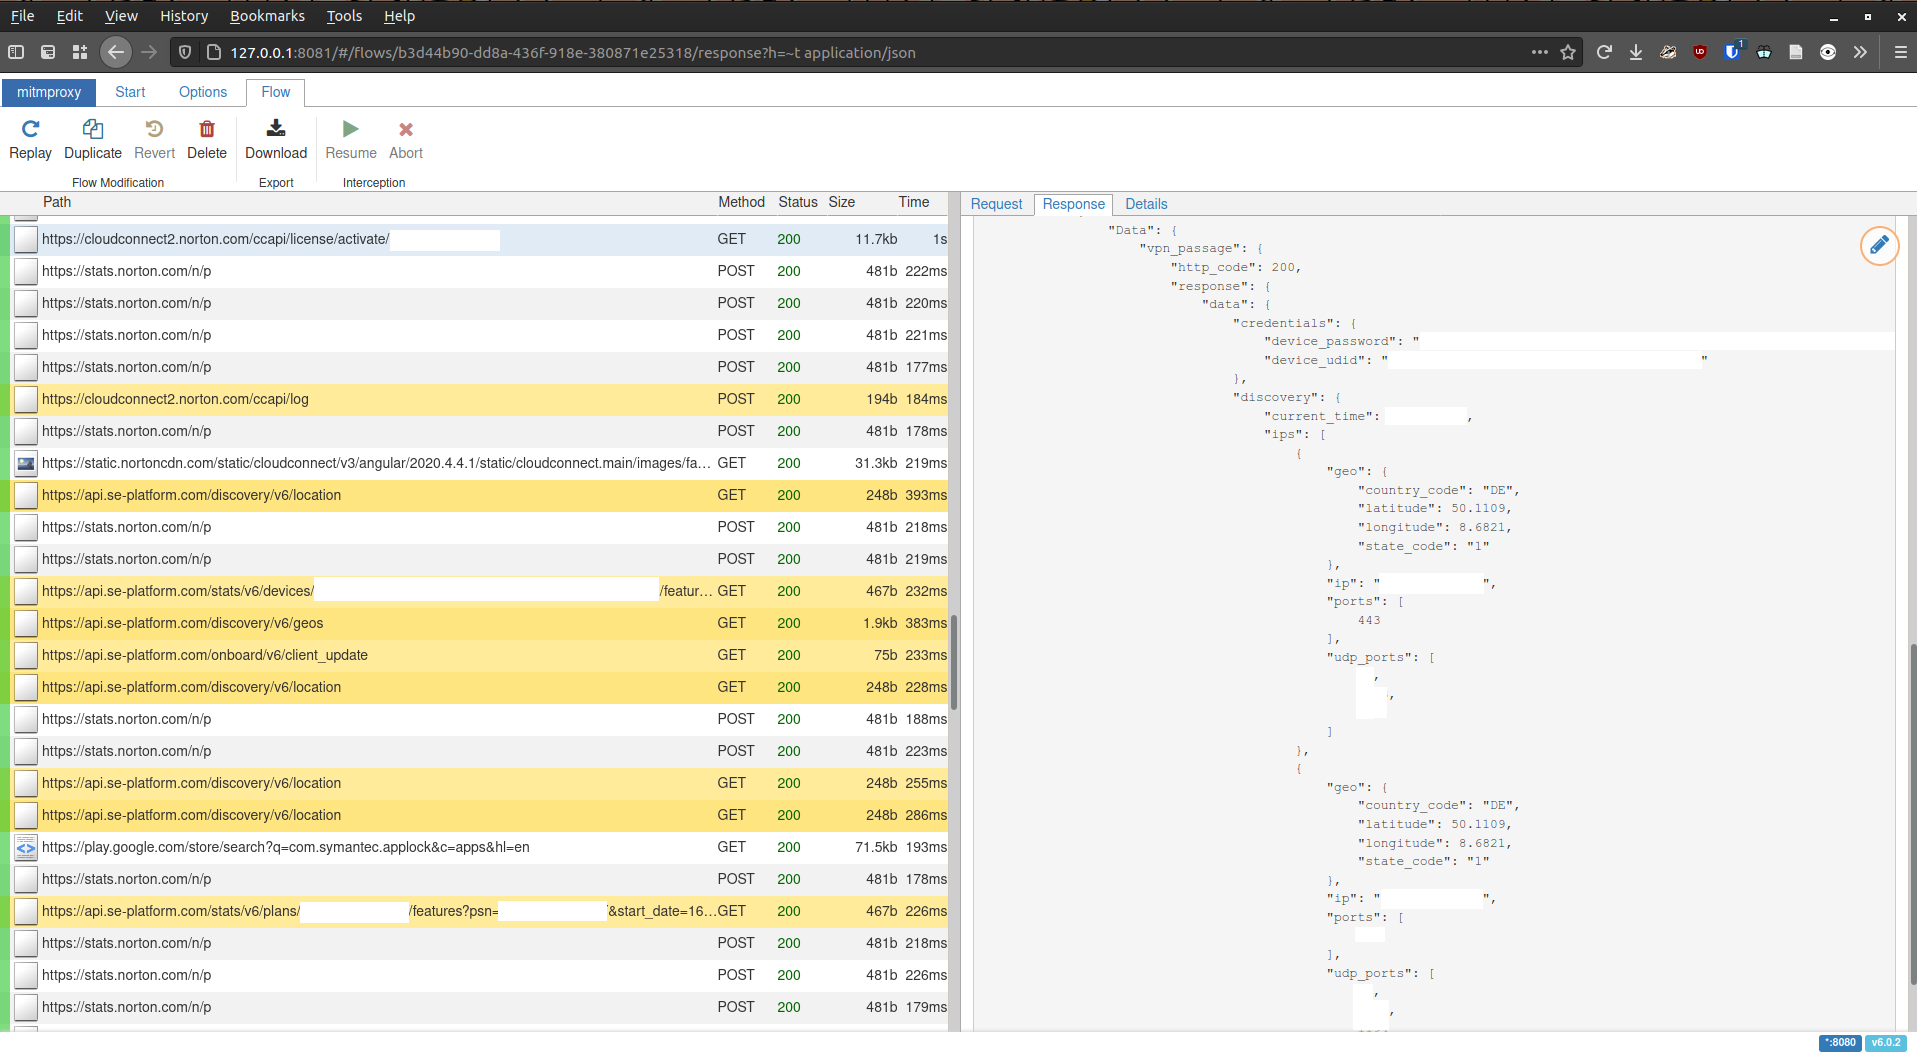
I'm not sure where the credentials end up after they've been received by the activation script. It appears that this information disappears into some of the functions in SecureStorage.class in the application, but I'm not sure. I don't care much, really, because this is everything we need to complete the OpenVPN configuration file! If necessary, it should be reasonably easy to use Frida to extract the secrets from the app itself.
The OpenVPN file
Based on the decompiled code, I concluded that each server is provided to the client with an IP address, a set of TCP ports and a set of UDP ports. With this, a configuration file is easily generated.
Replicating the request that returns all the right servers is quite annoying. You need a valid token to query the endpoint that returns the server IP addresses (even the one that doesn't send back a username and password). If I wanted to automate the process of keeping the OpenVPN config file up to date, I'd need to disable 2FA on my Norton account and setup a script to log in, gain an access token and then query the IP address list. For now, the VPN IP addresses seem to remain relatively constant so I haven't bothered.
Combining all the data gathered, I have generated the following OpenVPN configuration file. I had to make some tweaks to get them working. The username and password are stored in auth.txt because my OpenVPN client did not like it when the authentication configuration was provided inline. The text file just contains the username, a newline, and the password.
client
dev tun
ping 10
ping-restart 15
connect-retry-max 1
nobind
persist-key
;persist-tun
auth-user-pass auth.txt
remote-cert-tls server
verb 3
cipher AES-256-GCM
fast-io

; My Ubuntu had issues when dealing with DNS; I manually override it
pull-filter ignore "dhcp-option DNS"
pull-filter ignore "dhcp-option DNS6"
dhcp-option DNS 1.1.1.1

; The server did not provide my OpenVPN client with a valid IPv6 configuration but pushed routes nonetheless
; This triggered a problem on my PC, so I ignored those settings as well.
pull-filter ignore "ifconfig-ipv6";
pull-filter ignore "route-ipv6";

nobind

remote 18.194.44.138 443 tcp
; Below are a whole bunch of alternatives. Enabling multiple would be a nice fail safe, but I only need one entry right now.
; remote 18.194.44.138 53 udp
; remote 18.194.44.138 5353 udp
; remote 18.194.44.138 1194 udp
; remote 35.181.1.238 443 tcp
; remote 35.181.1.238 53 udp
; remote 35.181.1.238 5353 udp
; remote 35.181.1.238 1194 udp
; remote 63.32.98.30 443 tcp
; remote 63.32.98.30 53 udp
; remote 63.32.98.30 5353 udp
; remote 63.32.98.30 1194 udp
; remote 52.17.91.23 443 tcp
; remote 52.17.91.23 53 udp
; remote 52.17.91.23 5353 udp
; remote 52.17.91.23 1194 udp
; remote 13.51.6.83 443 tcp
; remote 13.51.6.83 53 udp
; remote 13.51.6.83 5353 udp
; remote 13.51.6.83 1194 udp
; remote 15.161.230.8 443 tcp
; remote 15.161.230.8 53 udp
; remote 15.161.230.8 5353 udp
; remote 15.161.230.8 1194 udp
; remote 52.49.104.214 443 tcp
; remote 52.49.104.214 53 udp
; remote 52.49.104.214 5353 udp
; remote 52.49.104.214 1194 udp
; remote 35.158.126.25 443 tcp
; remote 35.158.126.25 53 udp
; remote 35.158.126.25 5353 udp
; remote 35.158.126.25 1194 udp
; remote 35.176.91.31 443 tcp
; remote 35.176.91.31 53 udp
; remote 35.176.91.31 5353 udp
; remote 35.176.91.31 1194 udp
; remote 18.133.223.73 443 tcp
; remote 18.133.223.73 53 udp
; remote 18.133.223.73 5353 udp
; remote 18.133.223.73 1194 udp

<ca>
-----BEGIN CERTIFICATE-----
MIICbjCCAdegAwIBAgIJALpa3K/RGz7TMA0GCSqGSIb3DQEBBQUAMC8xCzAJBgNV
BAYTAkNBMQswCQYDVQQIEwJPTjETMBEGA1UEAxMKb3BlbnZwbi1jYTAeFw0xMjA4
MjQxNDQxNDVaFw0yMjA4MjIxNDQxNDVaMC8xCzAJBgNVBAYTAkNBMQswCQYDVQQI
EwJPTjETMBEGA1UEAxMKb3BlbnZwbi1jYTCBnzANBgkqhkiG9w0BAQEFAAOBjQAw
gYkCgYEAsFp/304CrPQsoCwEZjTgxH0L8bDfTLvouIc2aGxg8SdhHspA7Gl8pEri
+NjpDV8Z1zwH7vbxMFbV4e9XNU/3OSEO+IcwOf4U376bKMmv7jRtGydo6sCN7vxK
npMhQ8gT+oViVfkZj2rj7XXXHLJBWnIDy7yfI+we3XBM+Izz3xsCAwEAAaOBkTCB
jjAdBgNVHQ4EFgQUPOII5Sm8xvtWnRvlWvXFnUkOMyUwXwYDVR0jBFgwVoAUPOII
5Sm8xvtWnRvlWvXFnUkOMyWhM6QxMC8xCzAJBgNVBAYTAkNBMQswCQYDVQQIEwJP
TjETMBEGA1UEAxMKb3BlbnZwbi1jYYIJALpa3K/RGz7TMAwGA1UdEwQFMAMBAf8w
DQYJKoZIhvcNAQEFBQADgYEAG0hBjHvj5JSm39QrjjKgGDnchsHHV0ox1cPyWp+Z
v4iOjjWigz2jtnl1OetoZvJBOkgwf+r9yCU0/s9gYA8tjVYa2RKXf5DEivdLog4c
3eDsGXFuQm1YhTmdTcjiFs/0SYcbzP5AbNmTCv8KEaIaE6WGpzPKjccH7rd8Q2mk
/DM=
-----END CERTIFICATE-----

-----BEGIN CERTIFICATE-----
MIIDczCCAlugAwIBAgIJAKuDkCdxp6L+MA0GCSqGSIb3DQEBCwUAMC8xCzAJBgNV
BAYTAkNBMQswCQYDVQQIEwJPTjETMBEGA1UEAxMKb3BlbnZwbi1jYTAeFw0xNjA5
MDcyMDE2NDNaFw0yNjA5MDUyMDE2NDNaMC8xCzAJBgNVBAYTAkNBMQswCQYDVQQI
EwJPTjETMBEGA1UEAxMKb3BlbnZwbi1jYTCCASIwDQYJKoZIhvcNAQEBBQADggEP
ADCCAQoCggEBALUPElq24ia7M7zM2fbThPEUBAW5nk3w0sxrxBE6+KPhcmWXdGJa
5GHkdrB4aX5MpbC2sCs58kzgYfepTE1So9LIAB80EGXDbfOTX5yCHywKAA7Ac9E6
AjLaRswWR0yh57RuM9ySIKwv1Sw/ExCGahU0t84wjWWcJr3+jqENCZUfV1RhEn4K
qSiDW8A1HnKs/gqIAT5OEKys4iNYfTBqqJaBYbrGFAY1Jvme+Zku6HbZb2+9hkMu
x1sO1cbUo621PIDn16RJapXKTC3oyW06wLBd85DpOZbPR4gVzr3+acxAMc0fMhqS
dSzMWsHo58UzmmuBdW4qc1+c8h3zV9odAS0CAwEAAaOBkTCBjjAdBgNVHQ4EFgQU
cMoHZea7xGz+DoDc24doGnlE4FYwXwYDVR0jBFgwVoAUcMoHZea7xGz+DoDc24do
GnlE4FahM6QxMC8xCzAJBgNVBAYTAkNBMQswCQYDVQQIEwJPTjETMBEGA1UEAxMK
b3BlbnZwbi1jYYIJAKuDkCdxp6L+MAwGA1UdEwQFMAMBAf8wDQYJKoZIhvcNAQEL
BQADggEBAGAEOdtqjTsKOnZCUkyprM/bWudHV4q/MF/RWF26HzeFOz4hpwsTSPTv
V/D/FP+5zHC5ihzlxuALiehI2qIIPw55wdJZN/3OU+hcS+pLrIrMXI+BR07wbOmQ
cREpEn8WIz8/voUzTjr1ORrBEUkG6ntQYhOUbuPmFcthn7MjzechjHgwmbKcxEBS
1QRUFAmHHJj7WmoQqOzwESaEjy0uhOAJNopRfu5hCvzXRWZsfR9mOeM5jKm6cXTI
dbXle1wVXpFkkT0NEJ5afvrp8OEnFpxKLOxd42Lq1WLznuIzmPp6LmNagwdQJ+ey
5zsattm7vfKklM2ClUS1hFSICRzRne0=
-----END CERTIFICATE-----
</ca>
If you need want to use this file yourself, you'll need to grab your username ("device_udid") and password ("device_password") from somewhere on your phone. Maybe you can find the username and password on the Norton website or in the Windows client application; I haven't tried them, so I can't be sure.
Afterword
Could I have done this an easier way? Did I gain anything by writing a blog about it? Does anybody even read these? I don't know. Perhaps this post will be useful to the lost Linux user who is also trying to get the most out of their Norton subscription. For me it provided some nice real-life practice in bypassing security measures and Making It Work™.
Written by Jeroen on January 8, 2021